Thursday, April 27, 2017

Four Keys to Finding the Right Backpack

The backpack has been an essential tool for hikers, campers, students, and travelers for quite some time.  Finding the right backpack can seem daunting with so many sizes, features, and shapes.  Below is what I hope will be some helpful information on selecting the right backpack for you.

As with any gear you plan to strap on, comfort is highest on the priority list.  If your backpack is uncomfortable, doesn’t fit well, rubs in the wrong places, etc, you’re going to have a hard time enjoying your trek.  Some of the primary comfort features you’ll want to look for in any backpack include:
  • Well padded, inflatable, or air-filled shoulder straps to distribute weight evenly
  • Adjustable straps, ensuring your backpack sits comfortably & reduces strain on your back
  • Lower back support, cushion in the lumbar area
  • Contoured and padded backs that follow your lower back’s natural shape
  • To remove weight from your back and shoulders, look for padded hip belts that place more burden on the leg muscles
  • A waist or chest strap to keep the weight centered


Another important element of selection is to determine the activities where you’ll use your pack.  For short hikes, college use, or other short duration activities, a canvas pack should be sufficient.  For trail running, long bike rides, or long hikes in variable weather, a waterproof pack will be necessary.  Some important questions to ask yourself:

  • Will you be hiking, climbing, alpine skiing, trail running, walking around town, or footing it across campus?
  • What kind of materials and utilities will you be carrying around?
  • Will you be walking and carrying the pack for long periods of time, or from place to place with stretches of sitting in between?
  • What weather extremes does the pack need to endure?
  • Does it need to stand upright for easy loading and unloading?


We can’t leave out durability in our quest for a great backpack.  Most backpacks are tossed due to tears in shoulder straps, broken zippers, and stitching malfunctions.  Some of this can be due to overloading the backpack beyond its design.  The rest is due to cheap construction.  A few things to look for in a quality pack:

  • Double stitching
  • Sturdy, ultra-strong nylon materials, such as Ripstop, or at least a 500-denier nylon
  • YKK-grade zippers, self-repairing with sturdy pulls
  • Nylon straps
  • Double-pane, quilted, reinforced, leather, or rubber bottom for longer wear
  • Wipe-clean interior
  • Reflective material for walking across campus at night
  • Dirt-resistant color
  • Lifetime guarantee


Along with durability is how well the pack stores and protects your contents.  Most packs come with multiple compartments.  How many, what they hold, and how well they protect from the elements are important considerations.  Some factors to keep in mind include:

  • Compartments that hold books in place
  • Larger compartments for books
  • Several smaller zip pockets for pencils & calculators
  • Padded compartment for glasses and a hidden zip spot for keys
  • Mesh pouches for water bottles
  • Plastic rack inside the bag can help with weight distribution 
  • Water resistance – You may not need 100% waterproof, but some resistance can protect your belongings
  • Padded compartment for laptops, tablets


A few other considerations while searching to fulfill your backpack needs include the following.

  • Appropriate size. The pack should ride just above the waist.  Anything lower and it will place undue stress on the back
  • Budget – Going with a top name and high quality will save you in the long run.  However, go with as much as you can afford while getting the job done.
  • Style – Are you looking to impress your sorority sisters, or is functionality your most important feature?  Find the right mix for your purpose.

There’s a lot to consider with plenty of options when selecting backpacks.  However, if you figure out your basic needs and stick with comfort, durability, and quality, you should find your perfect match in no time.

Tuesday, April 11, 2017

Selecting Your Perfect Knife

One of the many childhood rights-of-passage is getting your first pocket knife.  I remember getting my first Old Timer from my Granddad.  I thought I was Davy Crockett reincarnated, ready to head out into the wilderness, eager to learn the ways of the mountain man, and excited to find that first good stick to whittle on just like all the old men down at the local tire shop.  Fantasizing aside, having a dependable, strong knife gives a sense of comfort and confidence unlike anything else you carry on a daily basis.  Choosing the right knife for you, and for your needs can vary; however, there are some fairly straightforward tips for choosing the best everyday knife.  To start, there are two primary types of knives to consider:  fixed blade and folding blade.

Fixed blades are easy to clean, quick to put into action, and have no moving parts to break or gunk up with mud, blood, hair, or other foreign material.  Fixed blade knives are inherently stronger due to the tang, which is the extension of the metal into the handle.  It is simple, elegant, and deadly efficient.  It can be used to cut wood, skin and butcher game, strike fire starters, build shelters, open cans, attach to a pole for a spear, as well as many other tasks.

There are several key features you want to look for in a general use, fixed blade knife.  You want a knife with a full tang or metal that extends the full length of the knife.  Knives with a partial tang are more susceptible to breaking in the handle and are not as sturdy for hammering and chopping wood.
A good survival knife will be around 10 inches long.  This gives enough length to be effective for big cutting jobs and remains small enough for finer cutting tasks around the campsite.

The favored blade for an all-around survival knife is a drop point with a full straight edge.  Depending on your needs and uses, there are several other blade types to choose from.  And anyone who likes having one knife will probably want several.  Along w/ the blade type, look for a knife with a thick, flat top.  This will allow for batoning, or hammering down on the top of the knife to chop wood, and also gives a wide surface for striking a ferro-rod.

Folding blade knives are popular for carrying anywhere (except airports).  They are smaller, making them easier to carry, and larger ones come with pocket clips and sturdy locking mechanisms.  They are designed to be opened with one hand using a thumb stud or blade hole, and many today are designed with an assisted opening device to spring the blade open once it has been started.

Selection of a folding knife, much like a fixed blade, is dependent on your needs and uses.  If most of your use is for opening Amazon packages, cutting through smaller food items, or whittling a whistle out of a tree limb, a smaller one, two, or three blade pocket knife will do the trick.  However, if you intend to use your folder around the campsite for bigger jobs, a heavier, thicker blade folder with pocket clip is what you’ll want.  The drop point blade is still preferred but will depend on what all you will need it for.

Knives are great tools that serve many purposes.  Having a strong knife handy at all times brings a sense of comfort like no other tool I know.  There is no single knife that is perfect for every situation, but hopefully, this is some good starter information to move you towards the knife that best fits your needs.

Saturday, March 18, 2017

Five Homemade Fire Starters

Campfires aren’t always a necessity, but what’s a weekend family outing without one?  Starting the campfire can be a challenge sometimes, but if you have a little knowledge, some good tinder and kindling, a good fire starter, and some patience you should have marshmallows roasting in no time.  Getting the fire started can be tricky sometimes.  Assuming you have assembled your tinder, kindling and fuel properly, you will need a good lighting device to get the tinder going.  Ah, but what do we use as a starter to help get the tinder going?  Below are some easy and effective fire starters to aid in getting your fire going in no time.

Coated Cotton Balls – Take some cotton balls from the bathroom and coat them in petroleum jelly.  Place them in a plastic zippered bag, an old coffee can, or some other small container that is easy to pack with your camping gear.  They light easily and get a fire burning quickly.

Pine Cones – If you have pine trees, pick up any pine cones laying around.  Take the pine cones and dip them in hot wax.  Once the wax is cooled, place your new fire starters in a bag or can to use on your next camping trip.

Bacon Grease – Here’s a good one that I don’t see people utilizing too much anymore.  Our grandparents used to save bacon grease, and other frying grease in jars and reuse for future cooking and many other things.  One use for bacon grease is fire starting.  Keep some in a small plastic container that fits with your camping gear.  It lights fairly easy, burns hot, and gives off a great smell.

Coated Wood Chips – Get some small wood chips and place them in small plastic cups or other containers.  Simply pour some melted wax over the chips and let them harden.  You now have a great fire starter.

Dryer Lint – Save the lint from the clothes dryer after each load of laundry and keep them in an old egg carton.  Pour hot wax over the lint and you will have a dozen fuzzy fire starters that light easily and burn for several minutes.


These are just a few easy, no-cost ways you can help get your campfire going and begin enjoying time around the blaze.  If you have any other creative fire starters you’ve used, please comment below and let me know how they’ve worked.  Happy Camping!!

Wednesday, March 8, 2017

Four Great Cooking Campfires

There’s something about a campfire that inspires, intrigues, and brings people together.  When man harnessed the ability to make and control fire, he opened many possibilities we take for granted today.  Staying warm, drying wet clothes, shaping metals, making pottery, scaring away wild animals, boiling water, creating communication signals, and cooking meals are some of the most important tasks made available through fire.  For the campsite, there are four basic campfires you can construct with relative ease in order to stay warm and cook some great meals during your outdoor adventure.

A Tepee Fire is the one I think most people envision when discussing a campfire.  Just like it sounds, it’s shaped like a teepee with standing lengths of wood.  This type of fire provides a good light source for the campsite and a high heat source for boiling a pot of water or roasting meat on a skewer.  To build the teepee fire, drive a stick securely into the ground and then place a circle of sticks leaning against the secured stick.  Leave a window on the windward side to allow air flow and keep feeding the fire as it continues to burn.

The Pinwheel Fire, or Star Fire, is shaped like the spokes on a wheel without the outside rim.  The fire burns at the center, or hub of the wheel and produces lower light and heat.  This fire is used when a large fire is not necessary, you are trying to conserve fuel, or you need a more concentrated heat source for frying.  Use 1 to 2 inch diameter sticks for fuel and once the fire is going, continually push the sticks inward as they are consumed.  This fire requires more attention, but also provides more temperature control for frying that trout you just caught.

A Log Cabin Fire is another fire for excellent light and heat.  Constructed like a log cabin with cross-hatched logs, this arrangement allows for plenty of interior space for tinder, kindling, and small fuel, leaves plenty of open space for excellent air flow, and exposes lots of wood surface for an even blaze.  This results in a quick supply of hot coals for cooking some great meals in your cast iron dutch ovens.  Also, if needed for survival, it makes for a great signal fire.

The Keyhole Fire is the multitasker’s delight.  The setup is made for building both a teepee fire and a log cabin fire at the same time.  Build a rock fire pit in the shape of a keyhole.  Build the teepee fire in the larger round part of the keyhole for heat, light, and any cooking you want to do with skewers or in pots.  Build a log cabin fire across the rocks in the narrow part for the quick supply of coals needed for cooking.  Once the log cabin fire has diminished, the teepee fire can continue to provide coals for any further cooking needs.

These are some of the typical campfires most people use in the outdoors, and each has its own benefits depending on your cooking and camping needs.  Always be sure to have good fire starting tools, ample supply of tinder, kindling, and fuel, and always practice safety and no trace left behind.  I’d love to hear about your favorite campfire and why you like it.  I’d also like to hear if anyone has experimented with any other ingenious forms of building a campfire.  Happy camping!

Tuesday, February 28, 2017

Six Easy Ways to Have Outdoor Fun With Your Kids

Getting the kids outdoors is a greater challenge today than ever before.  Smartphones, game systems, and social media have made it convenient for kids to hole up in their rooms.  Family time has taken a back seat and in some cases disappeared altogether.  There are some easy outdoor activities you can do with your kids to get them re-engaged with the big yellow ball we know as the sun and re-engage family relationships at the same time.

1. Hike the neighborhood park
You don’t have to drive out of town, or even out of state, to enjoy hiking with your kids.  Most neighborhoods and small towns have a park with some good trails.  You may know of a local farmer or rancher who would be kind enough to let you roam their land.  If you’re lucky enough to have a river nearby, there are typically some good hiking areas around these bodies of water that are typically public lands.
2. Camping at a state park
If you’re somewhat adventurous, state parks are a great option for a short camping trip.  Most states have a system of parks that are well maintained, very inexpensive, and have some great outdoor activities available.  Most will offer tent and RV camping spots, and you can find several that will offer small cabins for rental if tents aren’t your thing.
3. Chillin’ in hammocks
There are some great camping hammocks out there that are easy to set up and comfortable for spending a day being lazy or even spending the night.  All you need is a couple of trees and a few hours to just hang out.  Kids love hammocks, and they’re a great option for a few hours lying around in the park or camping out overnight.

4. Family bike ride
Again, you don’t have to drive anywhere to get a thrill out of this option.  Getting outdoors and taking a bike ride around the neighborhood can be time well spent with the kids.  There is always the option of heading out of town and riding bikes on mountain trails or that same landowner that lets you hike his property.
5. Get a Frisbee
What kid doesn’t love throwing a Frisbee around.  This is another one where finding a local park or an empty lot can make for a fun time at little to no cost.  There’re all kinds of “Frisbee” options these days, so find one or several at your local store and go toss them around.
6. Go hunting
Now I know not everyone is into hunting deer, hogs, turkey, etc.  Some of the most fun can be hunting for different kinds of bugs, unique rocks to put in a rock collection, strange plants, or any other thing you can think of that interests you.  It’s about getting outdoors and enjoying time together.

Now grab your kids, drag them away from the Xbox and iPhone, and get outdoors.  Vitamin D and great family memories are in store!

Tuesday, February 21, 2017

Seasoning Cast Iron Cookware

Cooking with cast iron is an easy and fun way to make delicious meals while camping.  Most people, including myself, can be intimidated by dutch oven cooking when they first see it done.  There is some art to the process that takes some trial and error, but if you have any cooking skills in a kitchen you’ll be able to figure the dutch oven out pretty quick.

Once you’ve found some quality cast iron cookware, you’ll want to perform the all-important seasoning process.  Properly seasoned cast iron cookware can last multiple lifetimes, as is the case with a cast iron skillet I use that belonged to my grandmother long before I came along.  It’s not difficult, but it’s the most important thing you’ll do as it prevents rust and corrosion, and it creates the non-stick surface for easy cooking and cleanup.

The initial seasoning process can take an hour or more.  This process will ensure you remove any factory applied coatings and contaminants and get a good surface to make your first meal.  Each time you use your cast iron cookware, with proper cleaning and treatment, you’ll be adding strength to the coating and look of your cookware.

When you first acquire cast iron cookware, it typically has a factory-applied waxy coating to protect from rust while waiting for its new owner.  Some cookware comes pre-seasoned, getting you to the camp cookout sooner rather than later.  Even with pre-seasoning, I still like to go through a heating and cleaning process before my first use.

To get started you’ll need a grill or oven; however, it is suggested to season your cookware outside as there will be quite a bit of smoke created.  For the true old-school experience, you can build a substantial fire to put your cookware in, but we’ll focus on using the grill for now.  The steps are as follows:

1. Heat your grill to around 400 degrees Fahrenheit, or about 204 C.
2. You’ll want to use warm to hot, soapy water and a good scouring pad to remove any waxy coating or rust buildup.  You need to get down to a clean metal surface.  After this first seasoning, you should never use soap for cleanup again.
3. Dry the cookware thoroughly and place it over the grill to remove any remaining moisture.  Remove it from the heat and let it cool until you can touch it with a bare hand.
4. Use vegetable oil or shortening and rub it all over the surface of your cookware, inside and out.  Do NOT use flavored shortening or butter.  You can use a paper towel or cotton rag to spread the coating into the corners, holes, and pores of the metal.  Wipe off excess oil until you have a smooth, clean-looking surface.
5. Now place your cookware on the grill, upside down and close the lid.
6. Bake your cookware for at least 45 minutes and up to an hour.  If you do choose to do this inside, open windows, turn on fans, and disconnect your smoke alarms.
7. Turn off your grill, but leave the cookware inside to cool for at least 30 minutes.
8. Find a good oven mitt or welder’s glove and remove your cookware.  Allow the cookware to cool until you are able to handle it with bare hands.

Your cookware should have a dark brown to black appearance with a smooth, glossy surface.  You may need to repeat steps 4 through 8 two or three times to get the desired look.  Now you’re ready to cook some great meals and enjoy the great outdoors.  As you use your cast iron cookware, you’ll see that the grease, oil, and fat from your foods will further coat and season each piece.  Acidic foods can strip the coating, so pay particular attention to clean up and recoating after cooking these types of dishes.  With proper use and cleaning, your coating will become stronger, cleanup will be easy, and your meals will be delicious and satisfying.

Enjoy your cast iron cooking!  What are some of your best (or worst/funny) stories about using cast iron at your campout?

Tuesday, February 7, 2017

My First 14er


I had been hearing people talk about doing “14ers” for several years and my interest grew over the years.  Although I previously mentioned we have mountains in Texas, we don’t have any 14ers.  Colorado is the closest, and one of the best places for a variety of 14er experiences.  A few years back I had the opportunity to take my son on our first backpacking trip, and ultimately our first 14er.


The trip was with a group consisting of teenagers and adults.  We were to be guided by a group of twenty-somethings who spent their summers taking groups like us up and down the mountains in an area between Buena Vista and Leadville.  Our group would get to summit Mt. Elbert, the tallest mountain in Colorado and second tallest in the US at 14,440 feet.  It had been some time since I had done any exercise routines, so I knew I’d better get started early for this trip.  I later came to appreciate two pieces of advice I received for altitude management:  start taking antacids and aspirin a month ahead of the trip to help combat gas buildup and blood thinning in the higher altitudes.

Upon our arrival, we were given our backpacks, sleeping gear, tents, cooking utensils and food for the five-day journey.  We trekked through the woods and up a couple thousand feet in elevation to slowly acclimate ourselves to the thinning air.  This also allowed us to get used to the heavy packs, as well as the process of processing clean water cycles to stay hydrated.  A side note, I learned quickly that taking in water at elevation requires much more diligence and volume than at our typical lowland elevations in Texas.  Our first night was cool and crisp, but very comfortable.

After enjoying a beautiful mountain morning and some breakfast, we broke camp and headed up to the tree line at around 11,000 feet.  This out of shape dad was glad he got in some exercise, as the heavy backpack and steep climb was having its impact.  We made our destination for the next couple of nights and set up camp.  The mountain scenery is a wonderful experience, but one thing surprised most of us at this altitude and temperature.  Mosquitos were rampant!  This was the most unexpected event of the trip.  We had no warning and never thought to ask about these little demons.  We all hoped we had left them behind in Texas for this trip, but they were alive, well and hungry.  Anyway, we managed with what repellant we had.  Day two and three were primarily spent acclimating to the elevation, exploring around the area, and preparing for our early morning summit on Day 4.

On Day 4, we awoke well before dawn in an effort to make to summit and watch the sunrise.  The sound of rain was not what we wanted to hear that early in the morning, but we all drug ourselves out and headed up the mountain hoping it would clear before we got to the top.  Our prayers were answered shortly after heading out as the clouds dispersed and we hit the top of Mt. Elbert.  The scene was unparalleled with the sun peaking over the horizon and showing us the majestic expanse of the Rocky Mountains.


It was a great trip, made better by the fact I got to do it with my son.  Hopefully, we’ll get to go back and do some more in the future.  We had always loved camping, but this trip took it to another level and really piqued my interest in doing more hiking and backpacking in the future.  I just have to save up for the right gear, get back to exercising, and get out on the trail.  

I’d love to hear from anyone out there who has had 14er experience and are there any favorites.

Tuesday, January 31, 2017

Have you ever found yourself unprepared for a camping weekend?

Several years ago, I embarked on a camping trip with my son and a larger group known as the Indian Guides.  This group went on several camping trips to various state parks each year, and one of the favored location was Fort Davis in the Davis Mountains of West Texas.

Nestled along the foot of the Davis Mountains (yes, there are mountains in Texas), Fort Davis attracts many types of tourists, including motorcycle enthusiasts, star gazers, history buffs, and outdoorsmen.  The old fort is a National Historic Site that captures the history of the Indian Wars during the late 1800’s.  You can also venture a few miles up the road and participate in a Star Party at McDonald Observatory.  While you’re waiting for the night sky, there are numerous hiking trails to experience with some wonderful views.  And for camping, Davis Mountains State Park offers an abundance of campsites for tent or RV campers.

We always enjoyed our trips to Fort Davis, because every trip was completely different.  It seems odd to say since we were typically going there at pretty much the same time every year.  However, one thing we learned about Fort Davis is that it was like Forrest Gump’s box of chocolates…you never knew what you were gonna get.  One trip, I completely ignored reviewing the weather forecast and went with what I was seeing when we left home.  It was 90 degrees, clear, and sunny outside and looked to be a perfect weekend.

The curveball started coming on Saturday when a fierce north wind started blowing unrelentingly throughout the day.  It dropped the temperature to around 70, which was still nice and we had a great day of hiking, climbing, and going into town for some ice cream.  As sunlight waned and we wrapped up our outdoor meal and group activities, the wind continued to blow and temperatures began to drop noticeably.

We crawled into our tent and bedded down around 10:30, listening to the javelinas roam through camp and sniff around the tents for any morsels we may have left about.  A few minutes later the pitter-patter of rain drops began to hit the tent.  This is where my lack of preparation began to rear its head.  I had not packed the rainfly for our tent, so drops coming through the vents and hitting our face are what stirred us from an early slumber.  Fortunately, I did have some duct tape and I was able to install a makeshift cover to hold us over.

As I finished up the tape job, the rain began to turn to sleet with the wind continuing its assault on the valley and the temperature continuing to drop.  As the storm blew through, we heard some of the longest running wraps of thunder echoing through the canyons of the Davis Mountains.  We managed to add a few layers of clothing and wrap up in our sleeping bags for a night’s sleep.  Not a good night, but we managed a little shut-eye once the thunder subsided.

Waking the next morning, I expected to find our chores of tearing down and loading up to be a wet and somewhat cold affair.  What I did not expect was the next surprise Fort Davis weather had in store.  Upon exiting our tent, I stepped into a four-inch blanket of snow that had been deposited and was still being deposited by some of the biggest snowflakes I had ever seen.  Another member of our group had their tent collapse on them under the weight of the snow, and we all had a time getting out of camp that morning.  Despite the circumstances, we had our fun with some snowball fights and rolling around in the winter wonderland before departing for some more comfortable digs back home.

Tuesday, January 17, 2017

Image result for camping pictures


Camping Gear - What to Bring for your Next Adventure


It can be peaceful to spend time in the wilderness, away from it all.  As enjoyable as it is to sleep in a tent and cook over a fire, you will need some specific camping equipment to use while you spend time away from home.

Sleeping bags - sleeping bags come in variety of sizes, colors, and ratings for temperature.  If you’re camping in cold temperature, purchase a bag that’s rated for the expected overnight low.  If the temperatures are milder, your sleeping bag should be rated for warmer weather.  Some bags have special pouches to keep valuables safe and dry.

Sleeping Pads - If the idea of sleeping on the ground isn't appealing, you'll need a pad to place under your sleeping bag. Pads add a layer of insulation to keep you warm and also provide extra cushioning for comfort.

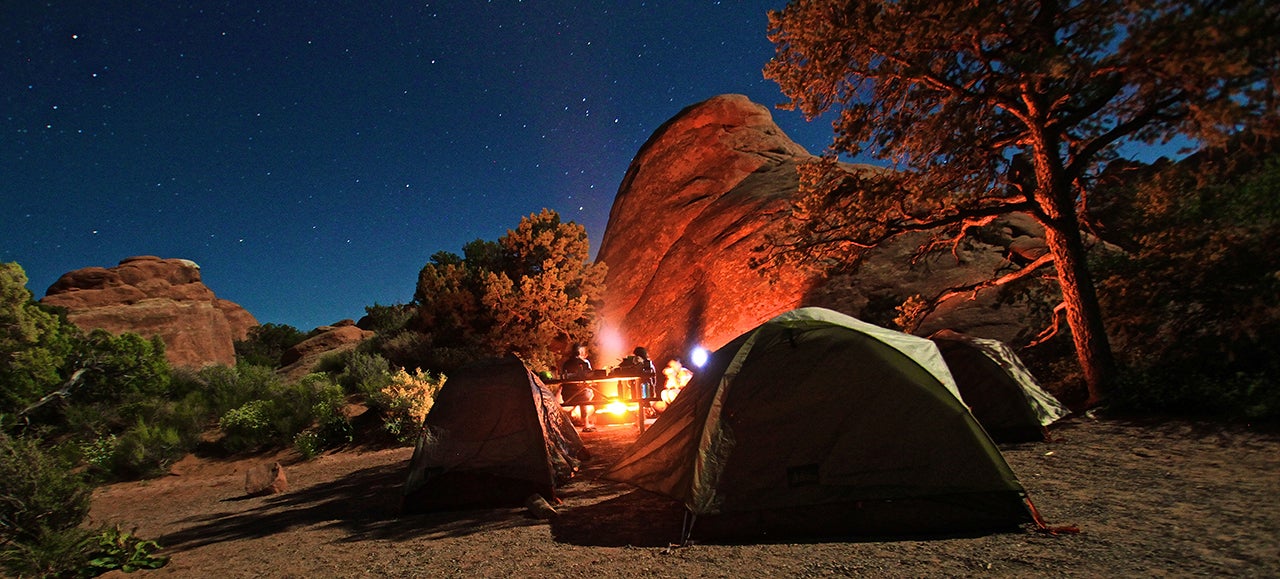
Tent - Unless you plan on sleeping under the stars, you will need some sort of shelter. A tent works well for protection from insects and precipitation. Tents vary in size, so select one that will accommodate the number of people in your party. Tents also have special features such as a rainfly that allows you to open the top for extra ventilation, or close it to keep out rain.

Cookware - You might not want to pack your best cookware for preparing food over an open fire, but you will need pots and pans to boil water and cook meals. Anodized aluminum and cast iron are two options. Don't forget plates, mugs, and silverware.

These are the biggest essentials as far as camping in the great outdoors.  Make sure to check out GearedForOutdoors.com for all of your outdoor camping gear.